CloudFlare Browser-rendered Terminal

CloudFlare Browser-rendered Terminal
In today’s fast-paced digital landscape, having seamless access to your homelab is essential for managing various projects and experiments efficiently. As a proud owner of a homelab filled with Linux boxes, I’ve always been on the lookout for innovative tools that enhance my workflow while ensuring robust security. Enter Cloudflare’s browser-rendered terminal—a game-changer that offers secure and convenient access to my Linux environments without the hassle of complex configurations. In this blog post, I’ll delve into how this powerful feature streamlines my workflow, enhances accessibility, and fortifies security, making remote management of my homelab easier than ever. Whether you’re a fellow tech enthusiast or someone considering a similar setup, I hope to share insights that will inspire you to explore the potential of Cloudflare’s tools in your own projects.
Part 1 Journey to Zero-Trust Network Access
As I continue my journey into implementing Zero Trust Network Access (ZTNA) in my homelab, one challenge stood out: accessing my LXC containers via SSH when I wasn’t connected to my home network. Running a homelab with Proxmox VE, mixing LXC containers and virtual machines (VMs), has given me great flexibility in testing services and configurations, but securely accessing my environment remotely was an ongoing issue I needed to solve.
The Problem: SSH Access Outside My Home Network
While SSH is my go-to method for accessing and managing my LXC instances, the problem arose whenever I needed to connect remotely. Without being on my home network, the options for securely accessing my containers became limited. Configuring port forwarding or setting up a VPN were obvious solutions, but they introduced their own risks and complexities, especially considering I wanted to maintain a Zero Trust framework in my homelab. With ZTNA, I couldn’t simply expose services without strict identity verification and secure communication protocols.
So, I needed a solution that adhered to Zero Trust principles while offering seamless, secure remote access.
Technology Options
There are a few common solutions for accessing a homelab remotely:
- VPN:
Virtual Private Networks (VPNs) are a popular choice for remote access. By establishing a secure tunnel into the home network, you can interact with your devices as though you’re physically there. However, VPNs often conflict with ZTNA principles, as they create a “trusted” entry point that can be exploited if compromised. They also require setup and management, making them cumbersome to maintain. - Port Forwarding:
Exposing an SSH port to the public internet via port forwarding is another option, but it’s one I wanted to avoid. Even with strong SSH security practices, such as using key-based authentication and disabling password logins, open ports are a known security risk and can be subject to brute-force attacks. - Self-Hosted Jump Boxes:
Another method is to use a jump box—an intermediate server that provides access to internal systems. This offers an additional layer of isolation but requires significant management overhead, including ensuring the jump box itself remains secure. - Cloudflare’s Browser-Rendered Terminal (My Chosen Solution):
After evaluating the alternatives, I chose Cloudflare’s browser-rendered terminal feature. It’s a free, easy-to-implement solution that aligns perfectly with Zero Trust principles. With Cloudflare Access, I could securely reach my LXC containers through a web browser without the need for port forwarding or VPNs. This feature eliminates the complexity of traditional remote access methods while ensuring every session is authenticated and encrypted.
Why Cloudflare’s Browser-Rendered Terminal?
Cloudflare’s browser-rendered terminal provides an elegant, secure, and Zero Trust-compliant method of accessing my homelab. Here’s why I went with this solution:
- Zero Trust Alignment: Every session is authenticated dynamically based on identity, device posture, and context. This ensures that access is granted on a per-session basis, adhering to Zero Trust principles.
- No Need for Open Ports or VPNs: The browser-rendered terminal allows me to SSH into my LXC instances directly from a web interface without opening any ports to the public internet. This greatly reduces the attack surface.
- Simple Setup: With minimal configuration, I could have Cloudflare Access up and running in no time. There’s no need to manage additional infrastructure like a VPN server or jump box, which simplifies my overall setup.
- Free Option: Cloudflare offers a free plan that makes it accessible to anyone running a homelab or even small businesses, allowing technical IT professionals like myself to implement enterprise-grade solutions without the hefty price tag.
The Setup: Secure, Remote Access with Cloudflare
Setting up Cloudflare’s browser-rendered terminal was straightforward. Here’s a brief overview of the steps I took:
- Set Up Cloudflare Access:
I registered my domain with Cloudflare and enabled Cloudflare Access, which allowed me to configure rules for verifying identity before granting access to my LXC containers. - Install Cloudflare’s Connector:
On my homelab, I installed Cloudflare’s connector, which enables secure communication between Cloudflare and my network without opening up public access. - Define Access Policies:
I set granular access policies to ensure that only authorized users (myself, in this case) could access the terminal. These policies include multi-factor authentication (MFA) for an extra layer of security. - Access My LXC Instances via a Web Browser:
With everything configured, I can now securely SSH into my LXC instances directly from my browser, no matter where I am. This solution adheres to Zero Trust principles, as it dynamically evaluates my identity and context before granting access.
The Benefits of This Approach
Using Cloudflare’s browser-rendered terminal to access my homelab LXC instances has transformed the way I manage my environment:
- Improved Security: The biggest benefit is the enhanced security posture. With no need for open ports or VPNs, I’ve reduced the risk of unauthorized access to my homelab. Additionally, every session is authenticated using multi-factor authentication and enforced by dynamic access policies.
- Simplicity: Cloudflare’s solution is simple to implement and requires minimal ongoing maintenance. This allows me to focus more on managing my homelab, rather than dealing with the overhead of maintaining a VPN or jump box.
- Cost-Effective: As a free solution, Cloudflare’s browser-rendered terminal fits perfectly into my open-source homelab. It proves that you don’t need expensive enterprise tools to achieve enterprise-grade security.
Master ZTNA, You Will: Cloudflare’s Browser-Rendered Terminal, the Way It Is
The Diagram
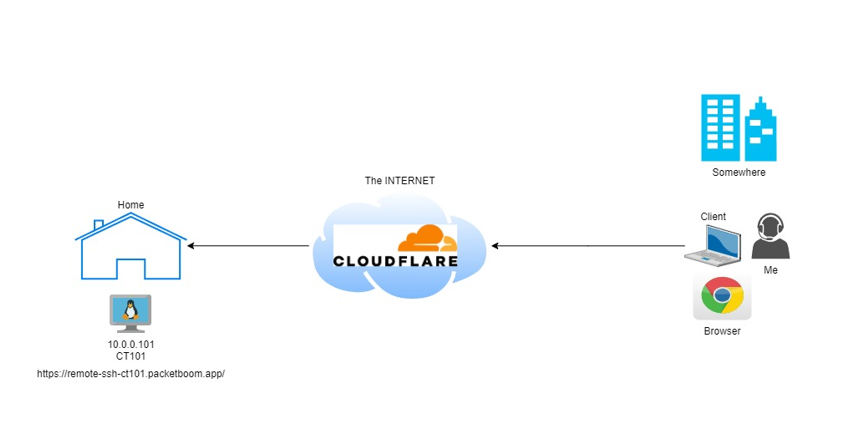
The diagram above is a simple one. I have a created a LXC server in Proxmox running on Ubuntu 22.04:
IP Address: 10.0.0.101
Note: It is assumed that you have already create a FREE Cloudflare account.
Procedure
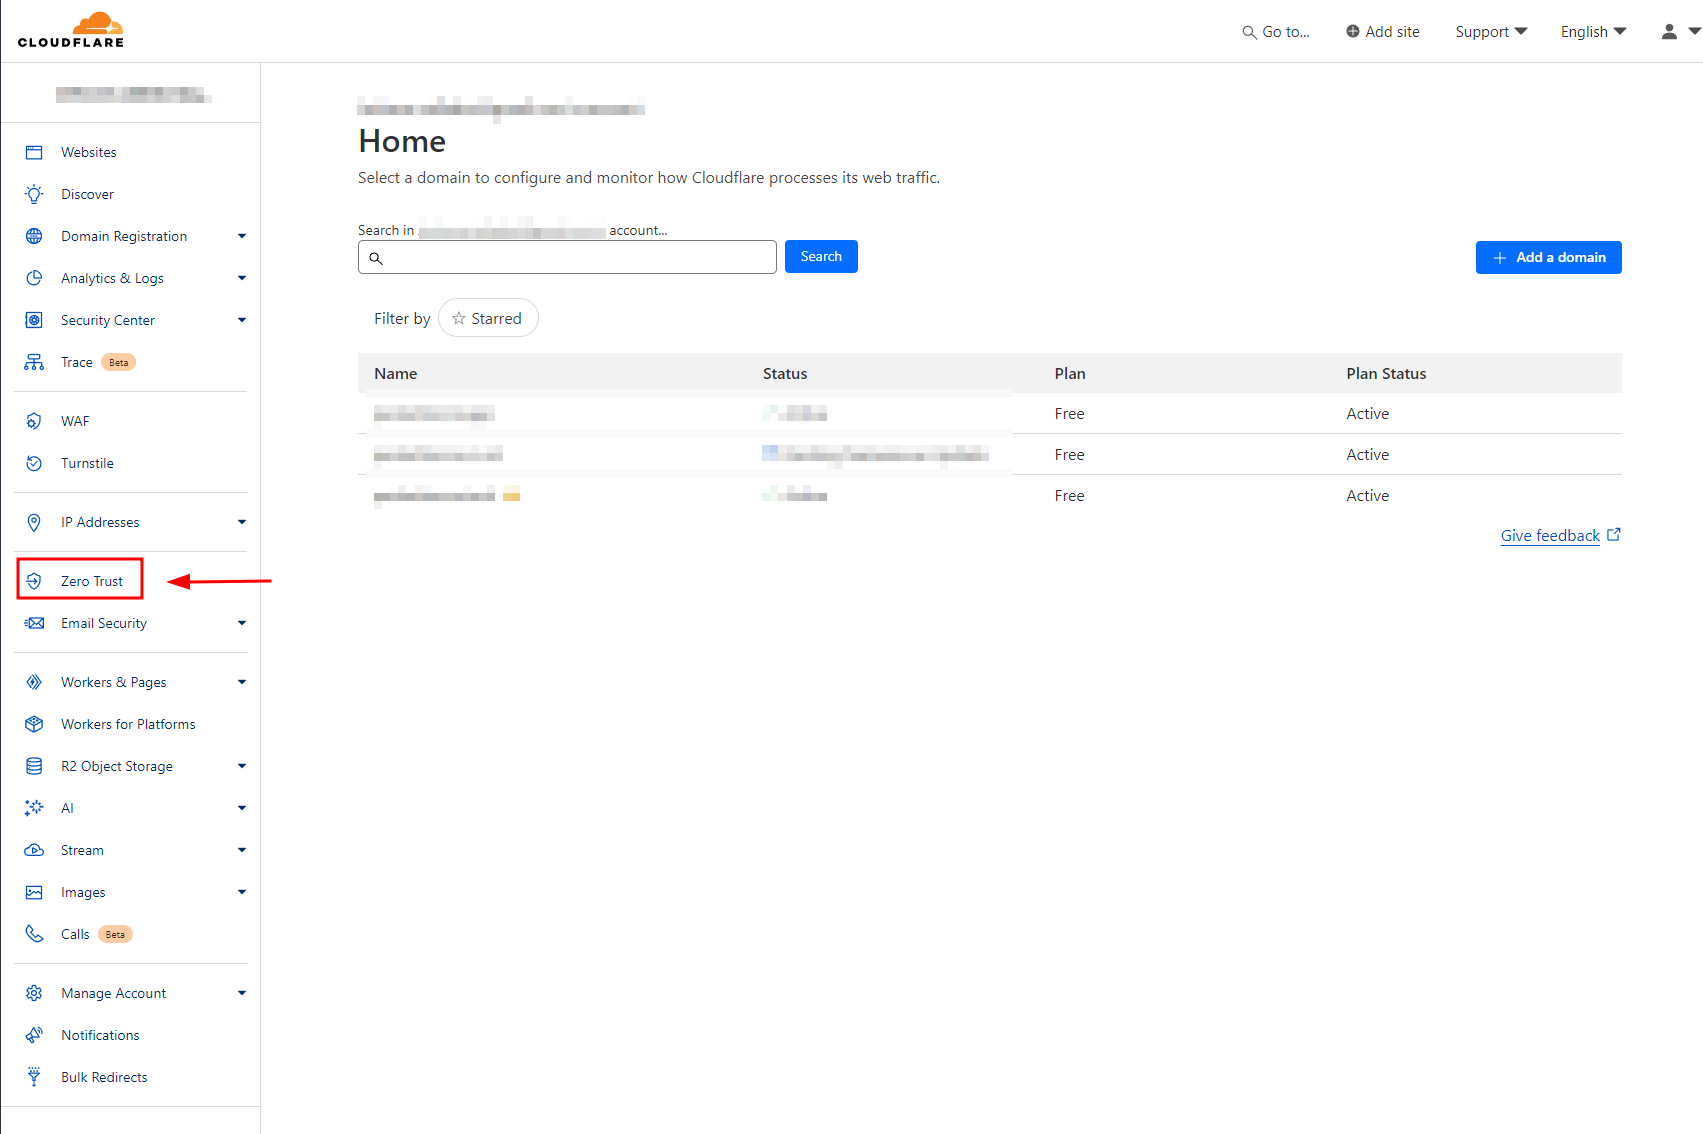
Step 1. Login to your Cloudflare account and click Zero Trust as shown below.
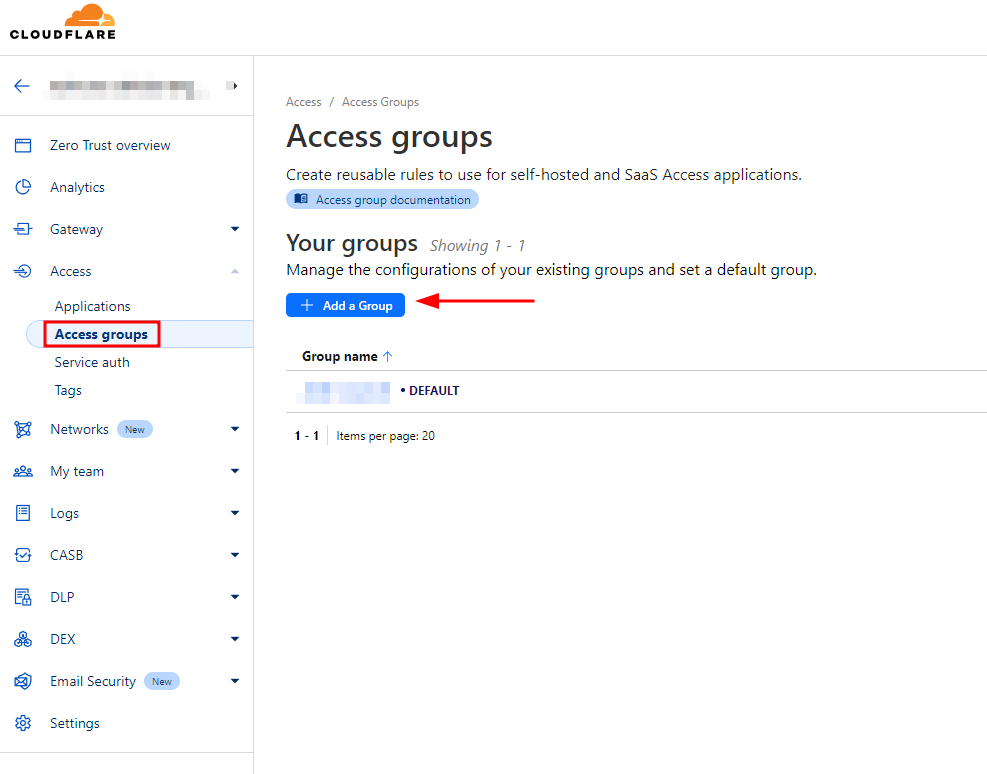
Step 2. Go to Access>Access groups and Add a Group.
This Access group will just simplify users to access your web based SSH service/application.
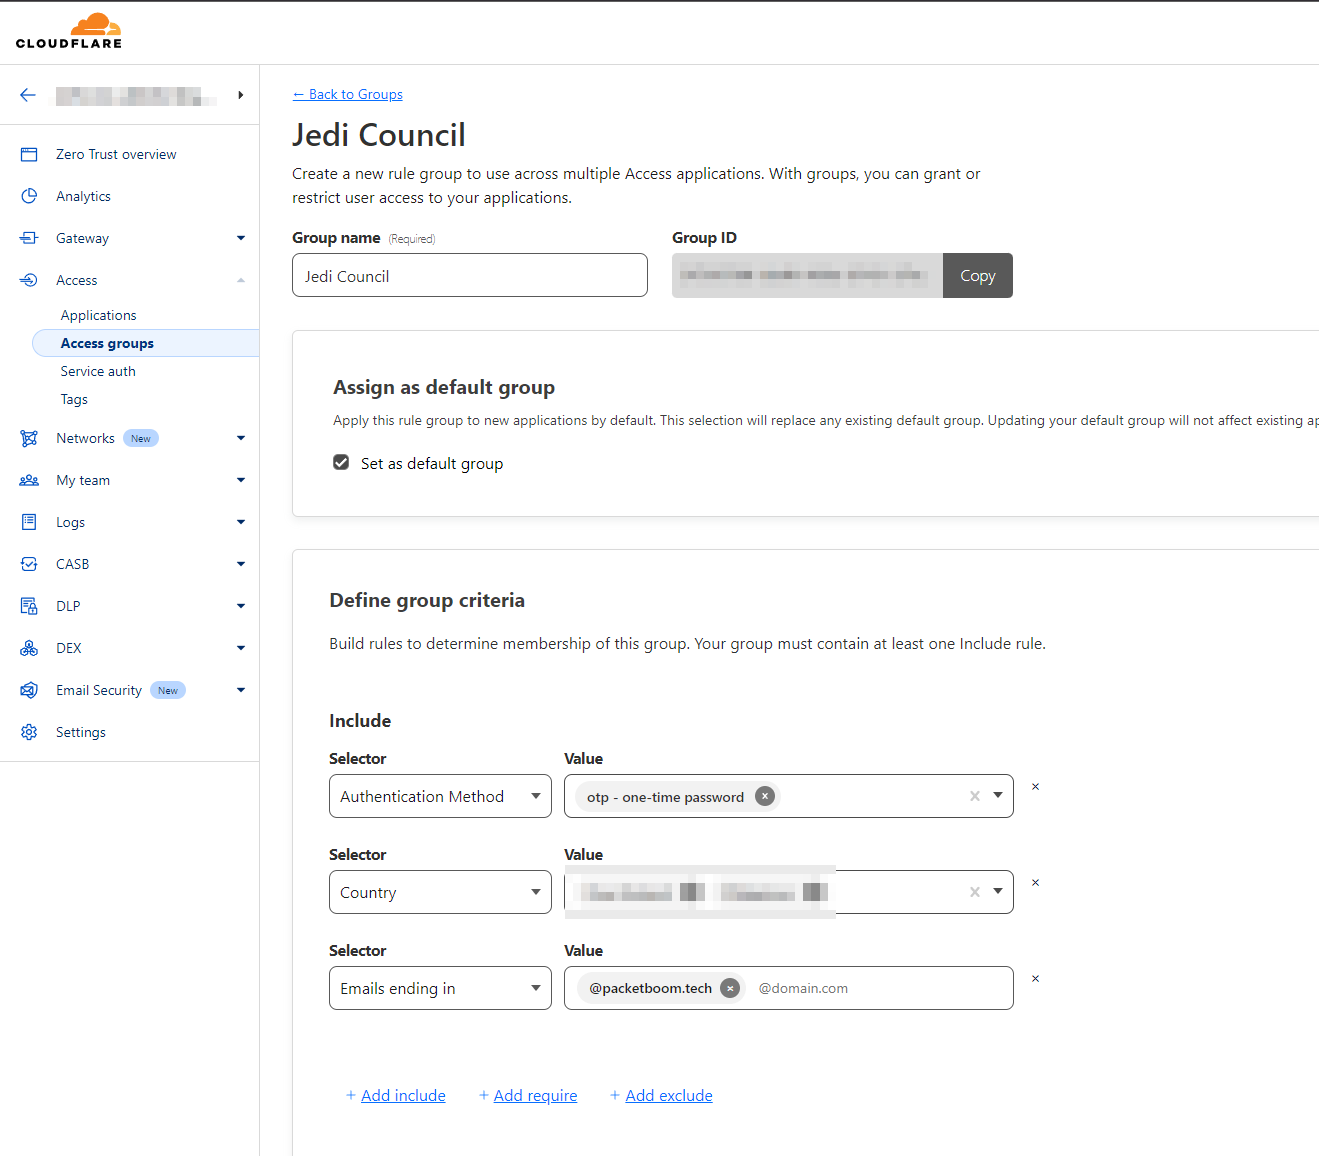
I would recommend to Define your group criteria to make it more secure.
As shown below I have included Authentication Method: OTP, Country, and Emails ending in: @mysite.packetboom.tech/.
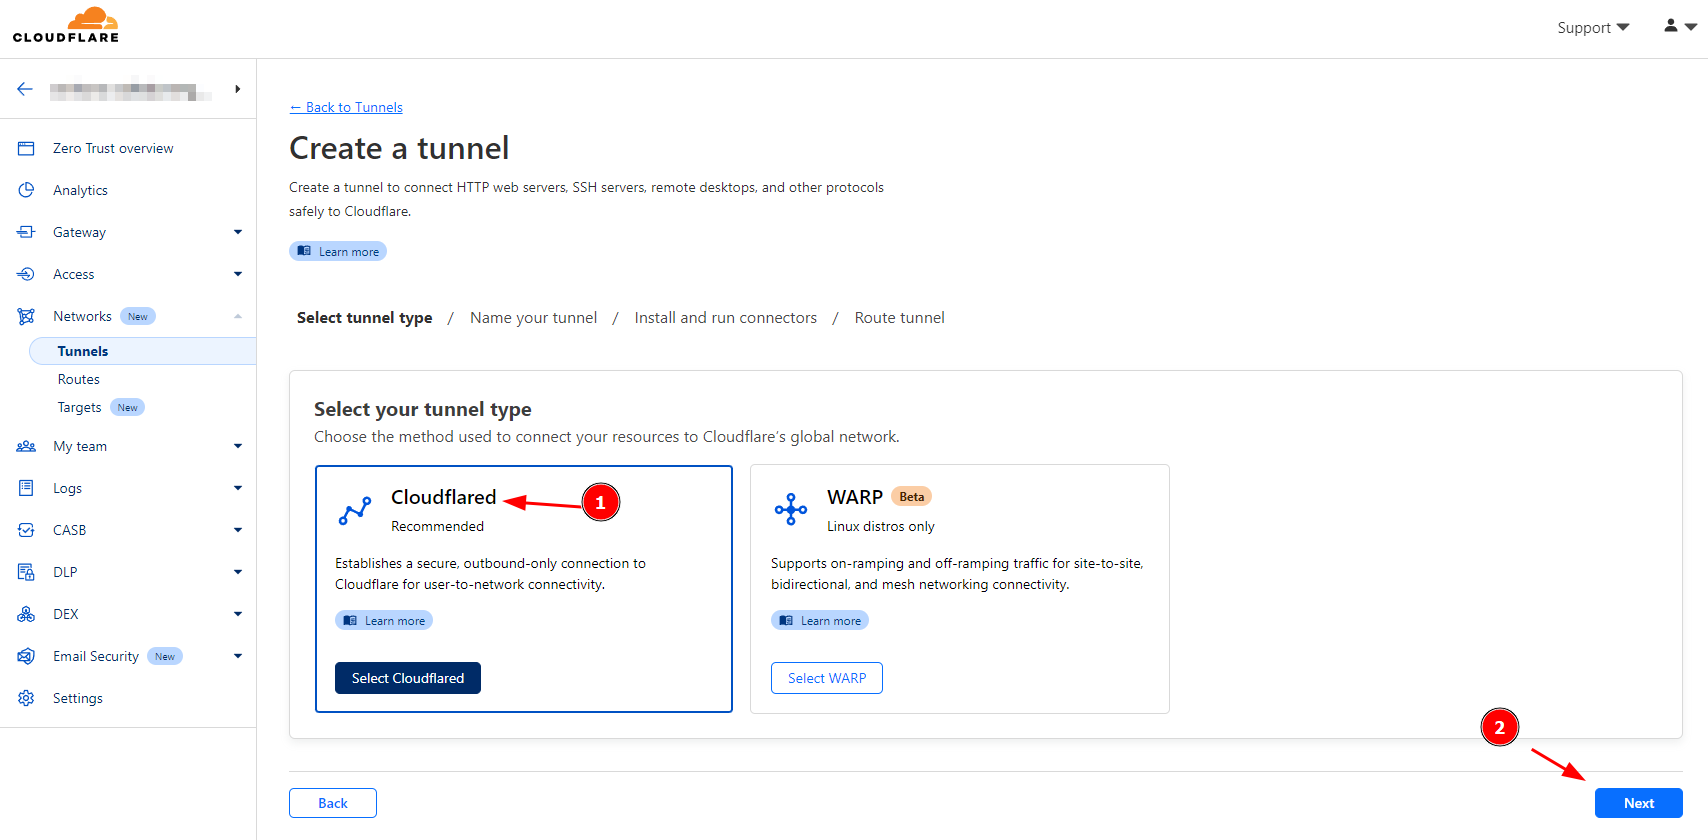
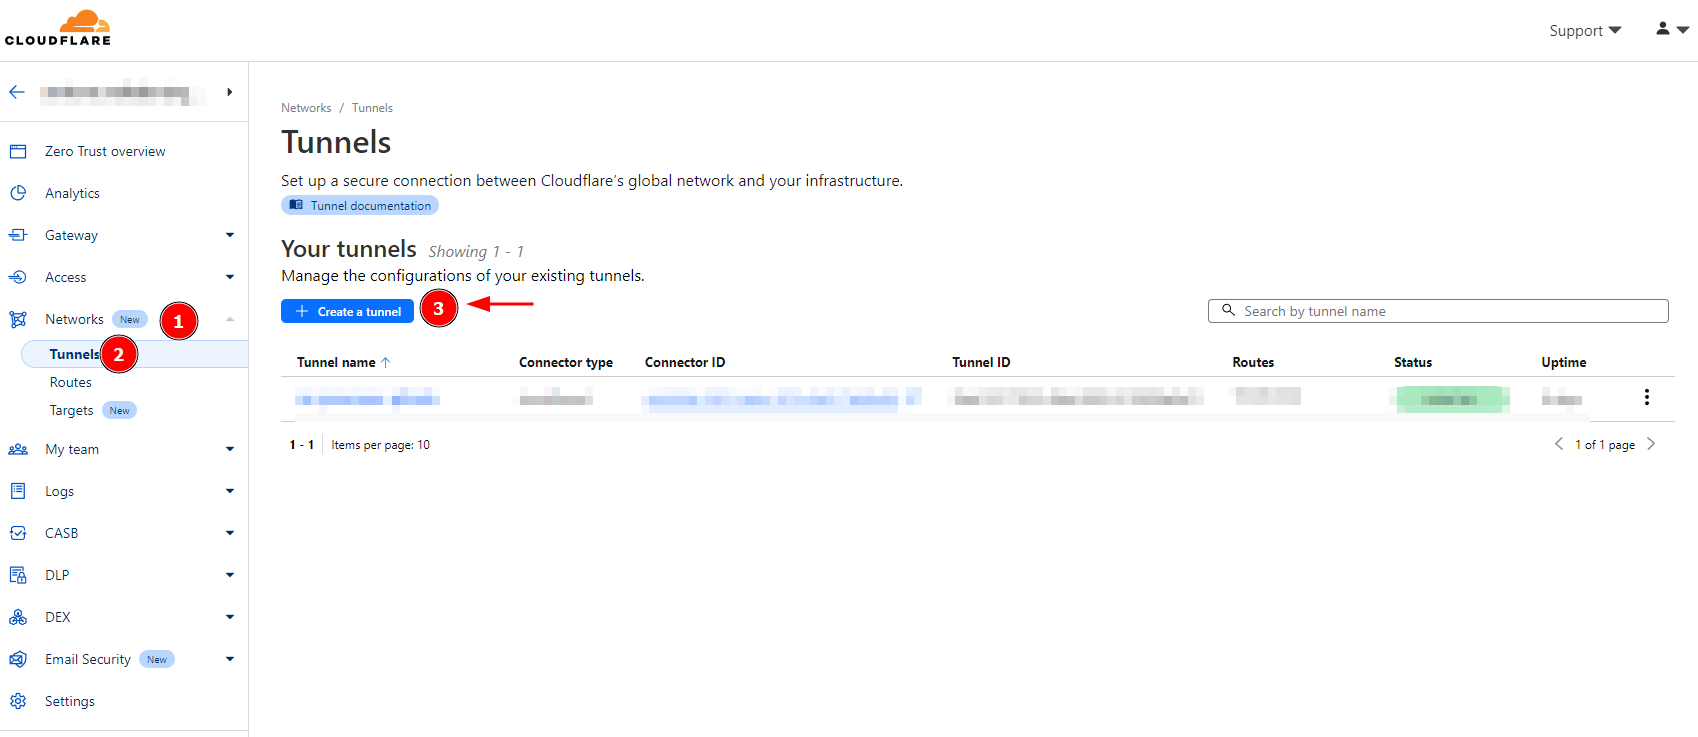
Step 3. Build the Tunnel. Go to Networks>Tunnels and Create a tunnel. And make sure you choose Cloudflared (Recommended). Hit Next Button.
To learn more about what Cloudflared means. Read this article: https://developers.cloudflare.com/cloudflare-one/connections/connect-networks/
Step 4. Setup the Tunnel details.
I named my tunnel ‘serverCT101-web-ssh’. You can name yours anything you want!
Since my server is a Ubuntu LXC box, I chose Debian and a 64-bit arch.
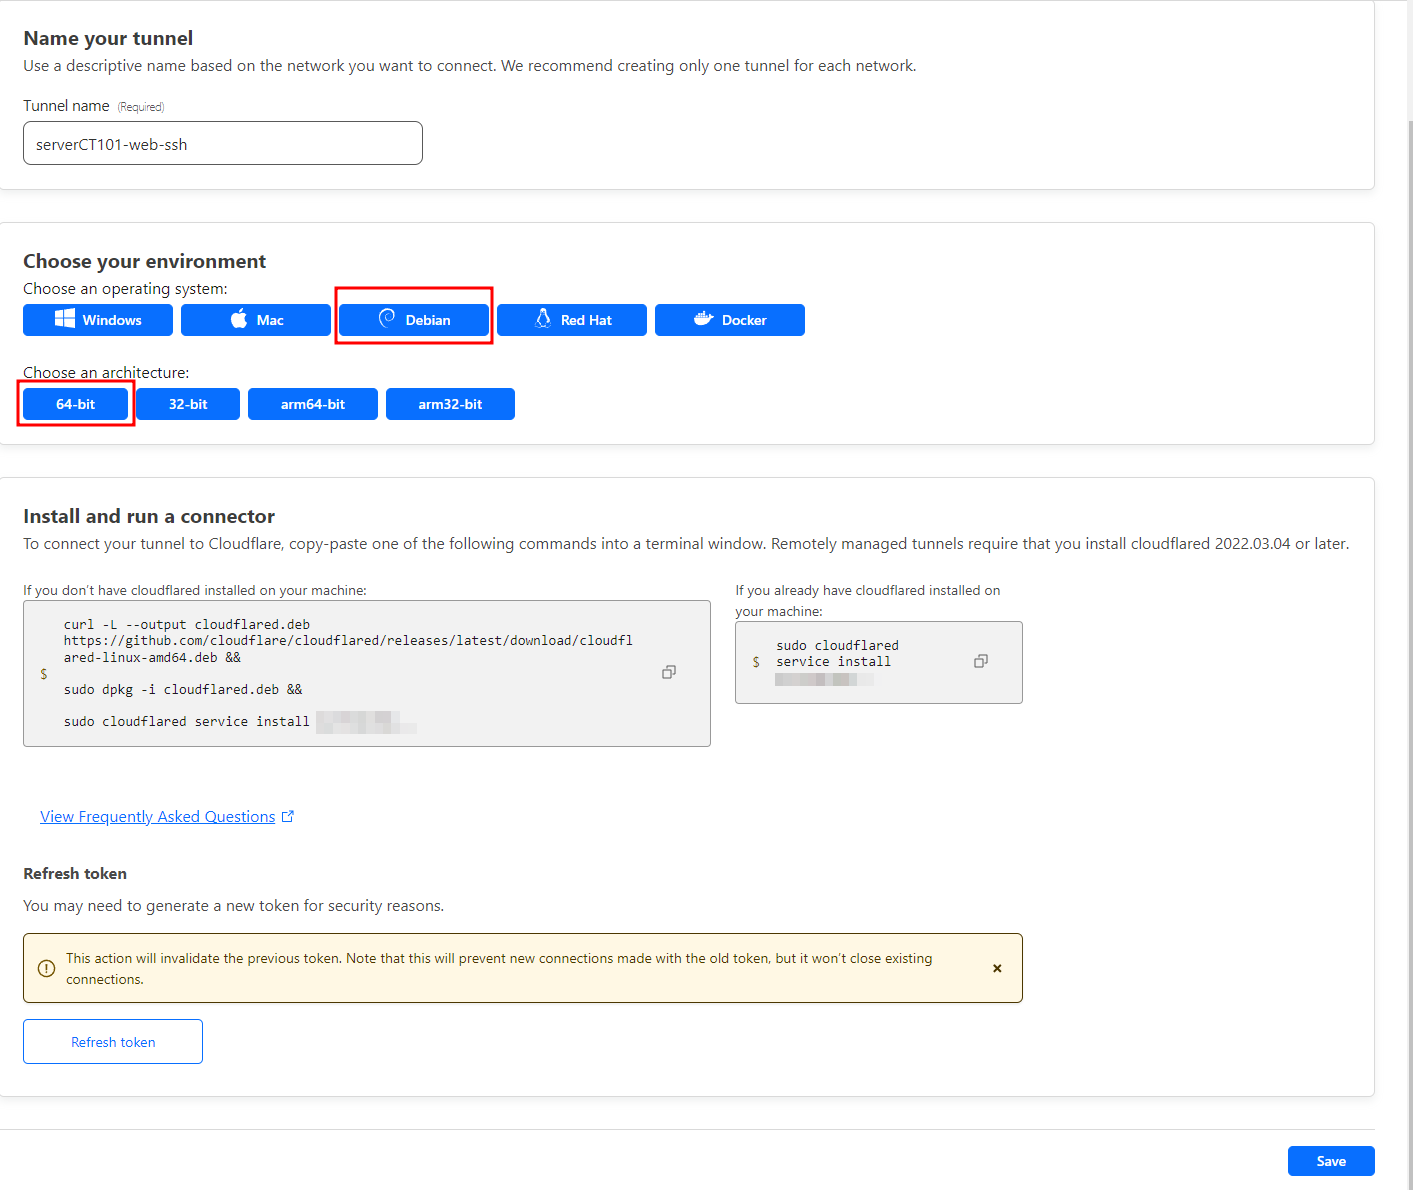
Now install the connector to your Ubuntu server just by copying the commands. This should connect the server to Cloudflare and create a tunnel.

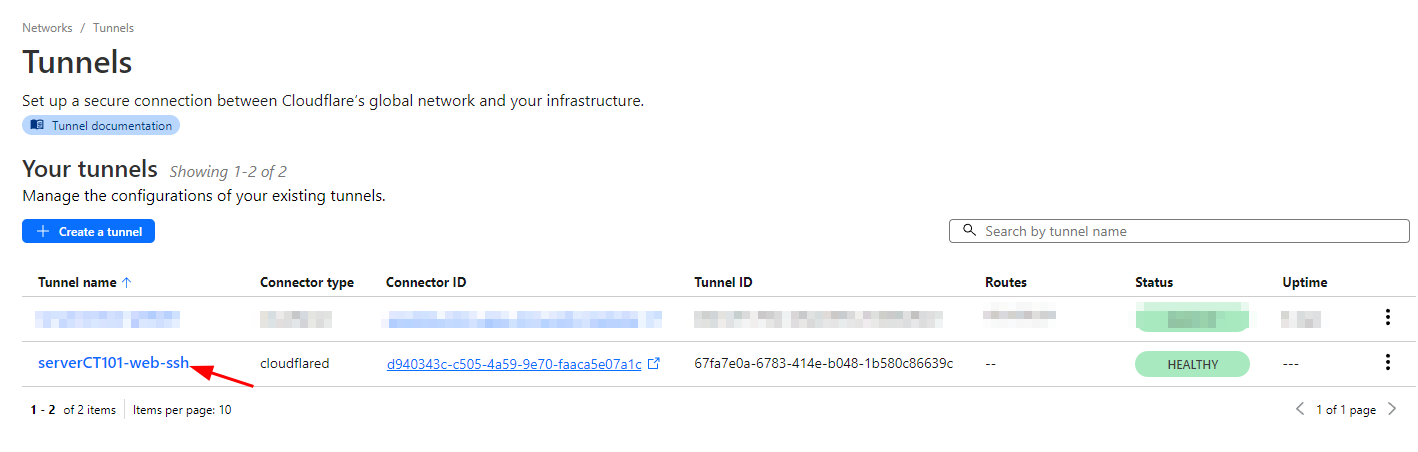
This should automatically connect to Cloudflare Tunnel. Check the tunnel in your dashboard like below. It should show Healthy!
Tunnel is ready! Now we get to configure the application and access.